
Are you searching for “how do I remove a bathtub drain stopper without breaking anything”?
Removing a drain stopper may seem simple, but the process can feel like cracking a safe if you are not familiar with the right process.
In the following guide, we will walk you through the exact steps to remove a bathtub drain stopper.
Let’s get started!
Why You Might Need to Remove a Bathtub Drain Stopper
Most homeowners ignore a drain stopper until something goes wrong. Typically, the component only requires attention for three common reasons:
- Clearing Clogs: Hair and soap scum love to wrap around the mechanism underneath the metal cap.
- Replacing Old Fixtures: Chipping finishes or cracked rubber seals allow water to drain when you want a bath.
- Deep Cleaning: Surface cleaning does not reach the sludge (often called “bio-film”) growing inside the drain pipe.
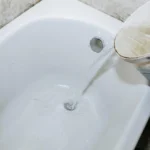
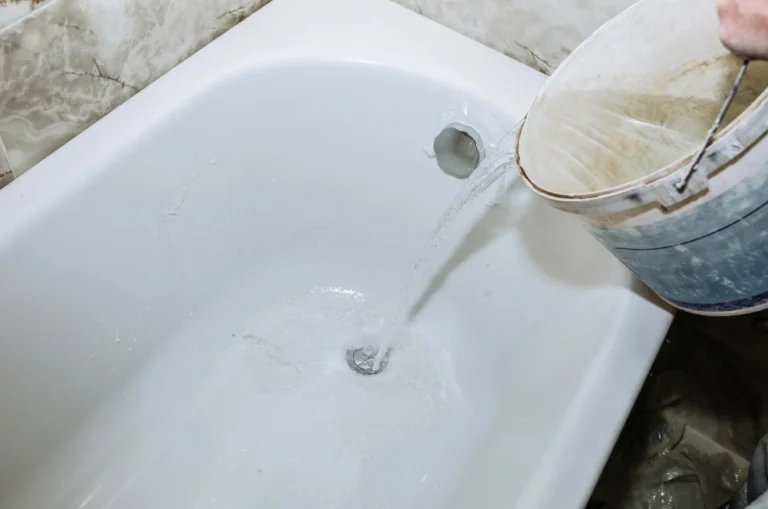
What You Need Before You Start
Bathtubs are expensive to repair if the enamel scratches or the drain shoe cracks. A little preparation goes a long way toward a successful project.
Tools You May Need (Depending on Stopper Type)
- Flathead Screwdriver: Necessary for unscrewing top caps or center posts.
- Phillips Head Screwdriver: Mainly for the overflow plate on trip levers.
- Needle-Nose Pliers: Helpful for grabbing small pins or stuck knobs.
- Allen Wrench (Hex Key): Essential for certain lift-and-turn models with hidden set screws.
- A Clean Rag: A rag is the most important tool on the list.
- White Vinegar: Homes in Deerfield Beach and nearby areas often have calcification. Vinegar helps dissolve the minerals.
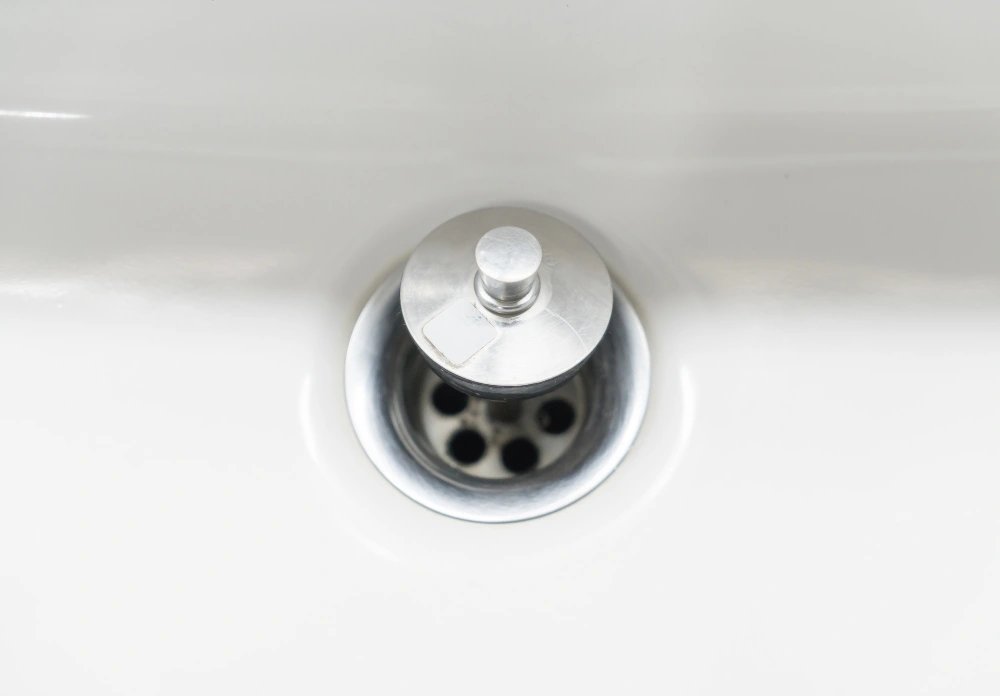
How to Remove a Toe-Touch Bathtub Drain Stopper
The toe-touch model is a common choice because of its ease of use. Removing the unit is usually straightforward unless the spring mechanism is rusted shut.
Step 1. Put the Stopper in the Open Position
The first step when removing a stopper is to press it down with your hand until it pops up into the “open” draining position. The shaft must be extended to access the internal mechanism.
Step 2. Unscrew the Top Cap
Then, hold the bottom cylinder shaft steady with one hand. Twist the top cap counterclockwise with the other hand. The cap should unscrew from the center cylinder. If the whole unit spins, do not panic. Simply move to the next step.
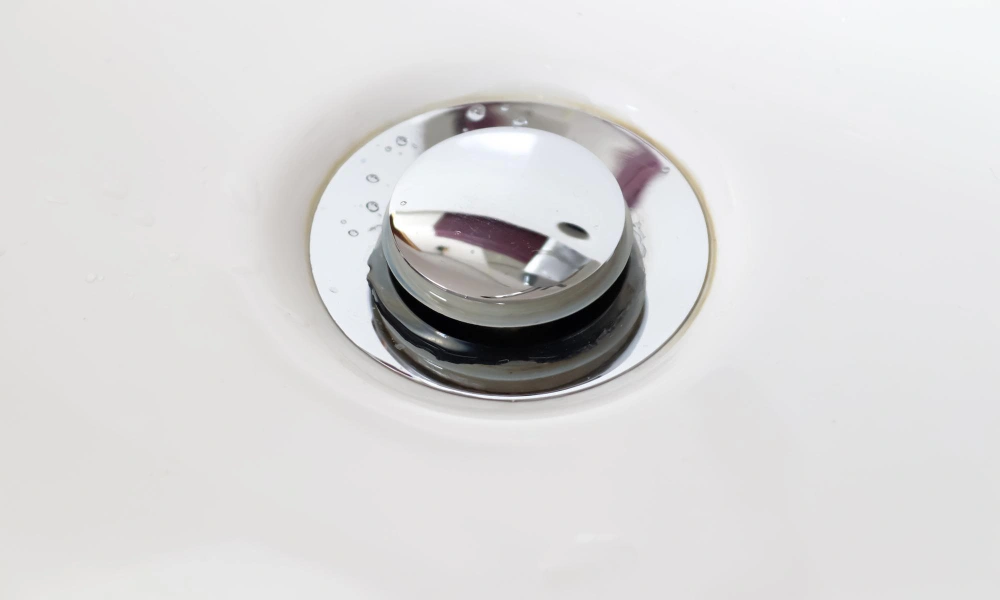
Step 3. Remove the Center Screw or Shaft
Look inside the cylinder once the cap is off. A flathead screw usually connects the unit to the drain crossbar. Use a screwdriver to turn the screw counterclockwise. If the top cap remained attached earlier, use pliers to unscrew the entire shaft from the base.
Step 4. Lift the Stopper Out
Now, pull the entire unit straight up and out of the tub.
Step 5. Clean and Inspect for Damage
Lastly, check the rubber seal at the bottom. A brittle or cracked seal indicates it is time to replace it.
How to Remove a Push-Pull Drain Stopper
A push-pull stopper looks very similar to a lift-and-turn model, but the mechanism is simpler. It operates on a straight vertical motion.
- Hold the Base, Unscrew the Knob: Lift the stopper to the “up” position. Hold the body of the stopper with a rag to get a grip. Use pliers or your hand to unscrew the top knob counterclockwise.
- Remove the Center Post: A brass post sits in the center once the knob is off. Use a flathead screwdriver or pliers to unscrew the post from the drain crossbar.
- Lift Stopper Out: The whole assembly should lift free easily.
- Clean Hair and Debris: A clump of hair is often wrapped around the base post.
How to Remove a Lift-and-Turn Drain Stopper
- Check for a Visible Set Screw: Lift the stopper to the open position. Look closely at the small knob on top or underneath the cap for a tiny hole with a screw inside. A flashlight makes the search easier.
- Loosen the Set Screw: Use a small flathead screwdriver or an Allen wrench if a screw is present. Most importantly, loosen the screw just enough to release the grip. Removing it completely increases the risk of the screw falling down the drain.
- Lift Stopper Off the Post: The top cap should pull off once the screw is loose.
- Unscrew the Post: Unscrew the large brass post from the drain itself.
- What if It Spins But Won’t Lift? A “channel” style might be in place if no set screw is found. Lift the stopper, turn it until it drops into a small notch, and then try to unscrew the unit.
How to Remove a Trip Lever (Plunger-Style) Drain Stopper
- Remove Overflow Plate Screws: Locate the round plate on the tub wall under the faucet. Remove the two screws holding the plate in place.
- Support the Linkage: Hold the plate firmly as the second screw comes out. A heavy metal linkage is attached to the back of the plate.
- Pull Plunger Assembly Out Slowly: Gently pull the plate and the attached linkage out of the hole. The rod might be a foot long with a brass or plastic plunger at the bottom.
- How to Adjust Plunger Height: The plunger might be too high if the tub was not holding water. Screw the linkage rod deeper into the bracket to adjust the height.
Warning: Do not force the linkage if it feels stuck. A snapped rod inside the wall turns a five-minute job into an expensive plumbing emergency.
How to Remove a Tub Drain Cover (If There Is No Visible Stopper)
When cleaning underneath a flat strainer, the following steps are applied to simple strainers:
- Look for a Screw: Most strainers have a single screw in the center. Removing the screw allows the cover to lift right off.
- Twist-Lock Covers: Modern covers might twist and lift without any tools.
- The Reality: Removing a cover reveals the P-trap. Be very careful not to drop a screwdriver, or a magnet will be needed to fish it out.
When DIY Is Not the Right Move (And That Is Okay)
Professional help is the smartest choice if these red flags appear:
- The Stopper Will Not Budge: Applying too much force risks snapping the crossbar inside the drain shoe. A broken crossbar requires replacing the entire drain assembly.
- Stripped Screws: A brass screw head that crumbles requires specialized extraction tools.
- Persistent Smells: A sulfur or egg smell that remains after cleaning suggests a dry P-trap or a venting issue.
- Water Backing Up: When water is backing up from the toilet, a main line clog is likely present.
In all the above cases, calling a professional ensures the job gets done without damaging the bathtub finish or plumbing seals.
Need a Hand with Your Plumbing Issues?
If a stuck stopper is causing frustration, Golden Air & Plumbing is ready to help. We have delivered comfort and peace of mind to South Florida homeowners for over 10 years.
Call us today to schedule your service and get $10 off!
Frequently Asked Questions
Hand removal is possible for “Push-Pull” or “Flip-It” stoppers if they are not overtightened. Most other types, especially “Lift-and-Turn,” require a screwdriver or Allen wrench to loosen the set screw.
Spinning without moving is a classic sign of a stripped thread or a hidden set screw. If checking for a screw does not help, the internal threads might be corroded. Try gently pulling upward while twisting to see if the threads catch.
Removing a drain stopper in a standalone shower usually involves a different process. Shower drains typically use a flat grid that snaps in or screws down, while tub stoppers are mechanical devices designed to hold water for a bath.
Taking the stopper out for cleaning will not cause a leak. However, unscrewing the main drain flange (the metal ring sealed to the tub floor) can break the waterproof putty seal. A broken seal will cause water to leak onto the ceiling below.
Pulling the stopper out to clean off hair and soap scum should happen every one to three months. Regular cleaning prevents “bio-film” buildup and keeps water draining at full speed.